A chainsaw sharpener grinding wheel should be replaced when it is cracked, chipped, wobbling, vibrating abnormally, or too worn to hold the profile required by the grinder manual. A wheel that is merely loaded with metal or slightly out of shape may only need dressing. The distinction matters: dressing exposes fresh abrasive and restores the working edge, but it cannot repair structural damage or recover material that is already gone.
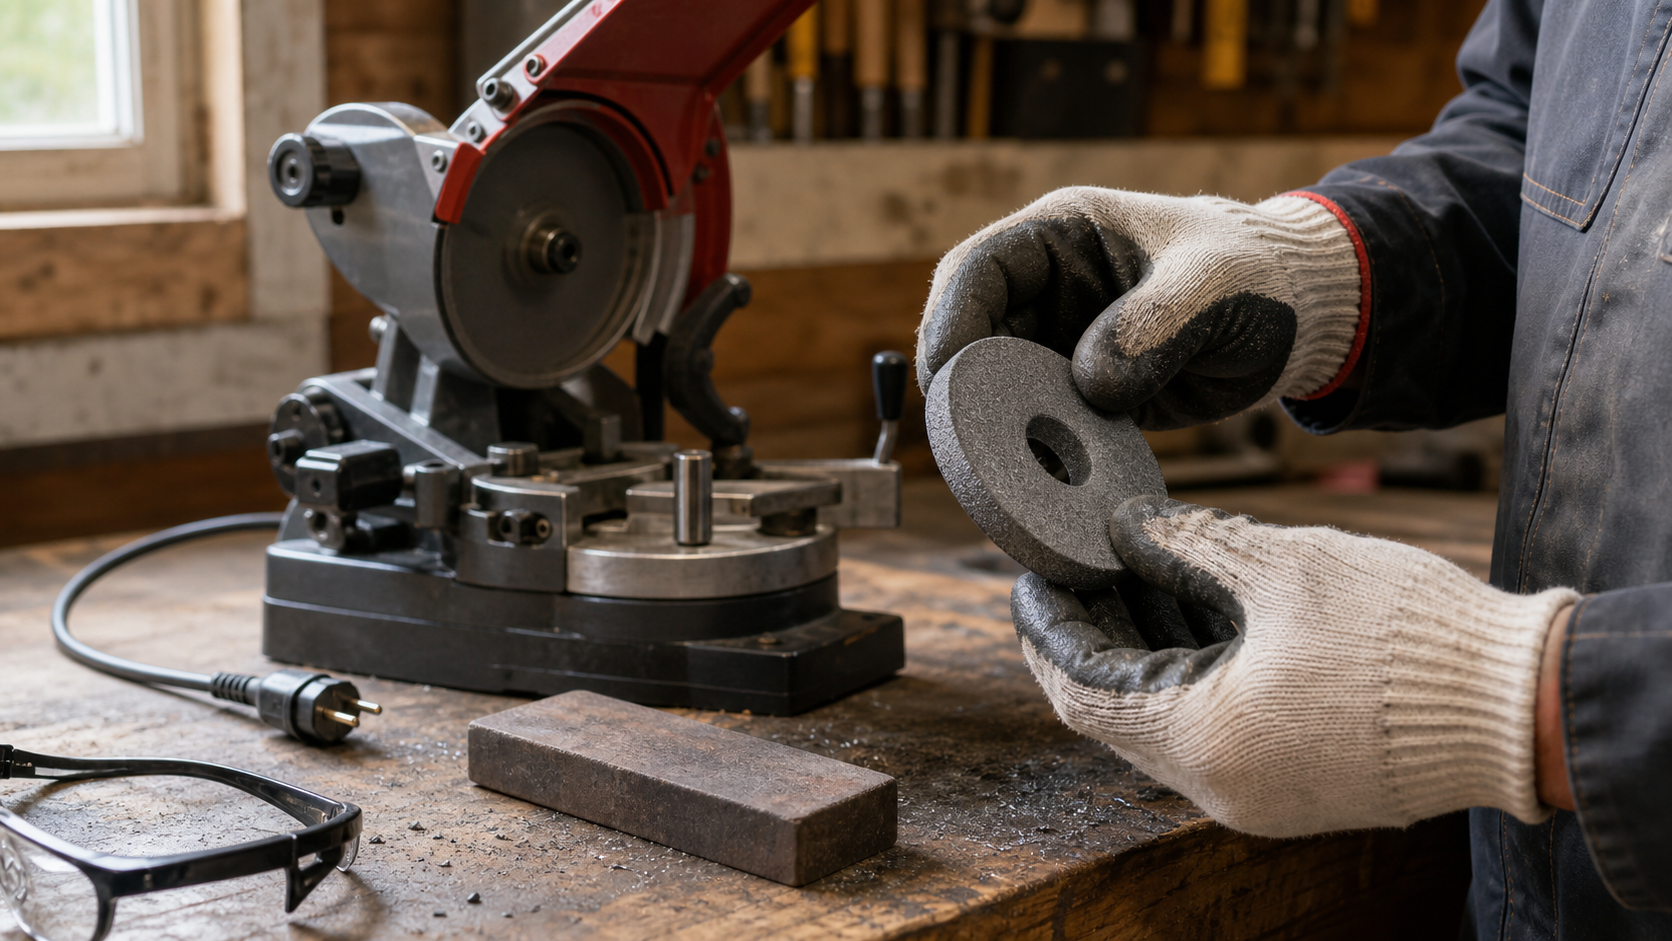
Unplug the sharpener before inspecting the wheel. Brush loose filings away, use good light, and follow the wheel inspection and mounting procedure in your machine manual. Do not judge the wheel only by how old it is. Its condition, profile, compatibility, and behavior during a test run tell you more than the calendar.
Dress or replace? Use this quick check
| Checkpoint | What to look for | Why it matters | Action |
|---|---|---|---|
| Wheel face | Dark, shiny streaks or packed-in metal with no visible damage | Loading can make the wheel cut slowly and heat the cutter | Dress the wheel, then test on a scrap or worn chain |
| Edge profile | Rounded, flat, or uneven edge that still has enough material to reshape | The wrong profile changes how the wheel meets the cutter | Dress to the profile shown in the grinder manual |
| Cracks or chips | Any visible fracture, missing piece, or damage around the bore | Dressing does not restore a damaged abrasive wheel | Replace the wheel |
| Rotation | Side-to-side wobble or abnormal vibration after correct mounting | The wheel, mounting surfaces, or spindle may be damaged or misaligned | Stop immediately; inspect and replace a damaged wheel |
| Cutter finish | Burning, heavy burrs, or inconsistent contact after setup is verified | A loaded or misshaped wheel may no longer cut cleanly | Dress once; replace if the fault remains |
| Remaining size | Wheel is too small to reach or shape the cutter as the manual requires | A sound wheel can still be worn beyond useful service | Replace with the specified type and size |
That table is a first sort, not permission to run a questionable wheel. If you find structural damage or cannot explain a vibration, leave the machine off until the cause is corrected.
Inspect the wheel at the bench
1. Start with the machine disconnected
Unplug the grinder and wait for every moving part to stop. Remove the chain from the clamp if it blocks your view. Clean the wheel guard, flange area, chain vise, stop surfaces, and the bench around the machine. Oily filings can hide small defects and can also hold a wheel or flange slightly out of position.
Look at both faces of the wheel, its working edge, and the bore. Turn it by hand only as the machine manual permits. Use a side light; a fine crack is easier to see when the light falls across the surface instead of straight at it.
2. Separate surface loading from physical damage
Loading usually appears as smooth or dark patches where cutter metal has packed into the abrasive surface. The wheel may feel less eager to cut, and the operator may be tempted to hold it against the cutter longer. That extra contact can add heat without improving the edge.
A chip, crack, enlarged bore, or damaged mounting face is different. It changes the wheel itself, not just its exposed abrasive. Oregon’s sharpening guidance says a wheel that gives a dull sound during the prescribed integrity check may be internally damaged and may need replacement. Use only the inspection method in your wheel or grinder instructions; if the maker does not specify a ring test for that wheel, do not invent one.
3. Check whether the edge still matches its job
The working edge must produce the cutter shape specified for the chain and sharpener. A flattened edge can contact too broad an area. A lopsided edge can touch high on one cutter and low on the next. A deeply rounded or undersized wheel may be impossible to restore without removing so much material that it no longer works in the machine’s adjustment range.
Compare the wheel with the profile gauge, template, or illustration supplied for the grinder. Do not copy the shape of the last chain on the bench; that chain may already have been ground incorrectly.
When dressing is the right first move
Dressing is appropriate when the wheel is intact but its cutting face is loaded or its profile has drifted. Oregon advises dressing vitrified grinding wheels often to maintain their shape, while STIHL grinder instructions call for checking the profile and dressing when necessary.
Use the dresser specified for the machine. Keep the guard in place, stand clear of the wheel’s plane during startup, and follow the grinder manual for the dressing motion. The goal is a clean, even abrasive surface and the correct edge profile—not simply removing a lot of wheel.
After dressing:
- Clear the loose abrasive and filings from the vise and stop.
- Recheck the wheel profile and grinder settings.
- Make brief, controlled contact on a damaged or end-of-life practice chain.
- Inspect the cutter under bright light.
- Confirm that contact is even and that the wheel cuts without abnormal vibration.
If the dressed wheel cuts cleanly and holds the required profile, keep it in service. If it loads again almost immediately, burns cutters despite light contact and correct setup, or cannot be shaped correctly, replacement is the more reliable choice.
Replace the wheel for these non-negotiable faults
Replace rather than dress when you find:
- A visible crack, chip, or missing section
- Damage, distortion, or unusual wear at the mounting bore
- A dull or suspect response during a manufacturer-specified integrity check
- Wobble that remains after the wheel and clean mounting hardware are installed correctly
- Abnormal vibration during the prescribed test run
- Insufficient diameter or edge material to form the required profile
- A wheel whose type, dimensions, or speed rating cannot be confirmed as compatible with the grinder
Oregon’s grinder manual is direct on damaged wheels: stop and replace them. It also tells the operator to stop immediately if abnormal vibration occurs and check the wheel. A new wheel is cheaper than trying to rescue a questionable abrasive component.
Do not assume every poor sharpening result proves the wheel is finished. A loose chain clamp, dirty stop, mismatched wheel, incorrect head setting, or cutters of unequal length can produce similar symptoms. Check those items before discarding an intact wheel.
Fit the replacement to the grinder and chain
A replacement wheel must match the sharpener, guard, mounting hardware, and the chain operation you plan to perform. Confirm the part information in the grinder manual or with the sharpener supplier. Wheel diameter alone is not enough; thickness, bore, abrasive type, maximum operating speed, and intended cutter or depth-gauge use all matter.
Clean the flanges and mounting surfaces before installation. Never force a wheel onto the spindle or improvise adapters. Install the guard and hardware exactly as instructed, then perform the manual’s integrity check and test-run procedure before bringing a chain near the wheel.
If you are choosing a grinder because repeatable setup and compatible consumables matter in your shop, review the adjustment and maintenance features offered by KonKell Chainsaw Sharpeners before deciding which format fits your workload. The useful comparison is not just motor power; it is how easily you can identify the correct wheel, set the chain securely, and repeat a clean cutter profile.
Diagnose a wheel that still gives poor cutter results
When a new or freshly dressed wheel performs badly, work through the setup instead of applying more pressure.
The cutter turns blue or dark. Use shorter contacts and let the abrasive cut. Recheck for loading, confirm the wheel specification, and inspect whether the head stop is making you remove too much material in one pass.
The wheel touches only one part of the cutter. Verify the edge profile, chain position, vise centering, and the settings specified for that chain. Dirt under a clamping surface can shift the cutter.
Left and right cutters look different. Check vise centering and indexing before blaming the wheel. Mark a reference cutter on each side and compare where the wheel first touches.
The grinder vibrates with a new wheel. Switch it off immediately. Confirm correct mounting and clean flanges according to the manual. If the wheel is damaged or the cause remains unclear, do not continue the test.
A simple workshop replacement routine
Keep the removed wheel until you have copied its verified part information, then mark a damaged wheel so nobody returns it to the shelf. Store new wheels dry and protected from impacts. Keep the correct dresser beside the grinder, not loose in a drawer where it will be substituted with whatever tool is handy.
Before each sharpening session, give the installed wheel a short visual check. Before mounting any replacement, repeat the full inspection required by its manufacturer. This habit catches damage early and makes wheel condition part of setup rather than something investigated only after a chain is spoiled.
FAQ
How often should a chainsaw sharpener grinding wheel be replaced?
There is no useful universal interval. Replace it according to condition and the limits in the grinder manual. A frequently used wheel may remain serviceable through repeated dressing, while a nearly new wheel must be discarded immediately if it is cracked, chipped, or damaged. Check the face, edge profile, bore, remaining size, mounting, and test-run behavior rather than counting chains.
Can a glazed chainsaw grinding wheel be cleaned?
An intact vitrified wheel with a loaded or glazed face can often be restored with the dresser specified by the grinder manufacturer. Dressing removes the clogged surface and reforms the working edge. Stop if you uncover damage, cannot achieve the required profile, or the wheel continues to cut poorly after the grinder settings and technique have been checked.
Why does my chainsaw grinder wheel keep burning cutters?
Common causes include a loaded wheel, incorrect wheel type or profile, excessive contact time, removing too much material in one pass, or a setup that makes the wheel rub instead of cut. Dress and inspect the wheel, then verify the head stop, vise, and chain specification. Do not compensate by forcing the wheel harder into the cutter.
Should a new chainsaw grinding wheel be tested before use?
Yes. Inspect and test a new wheel exactly as its manufacturer and the grinder manual direct. That may include checking its condition before mounting and running the machine briefly with guards installed while standing clear of the wheel’s plane. A new wheel can still be damaged by shipping, storage, or incorrect installation, so new does not mean unchecked.