How to Clean or Change a Chainsaw Air Filter | Husqvarna
If you’re a chainsaw enthusiast or just someone who occasionally uses a chainsaw for yard work, maintaining your tools is essential for safety and performance. One important aspect often overlooked is the air filter, particularly for popular models like those from Husqvarna. A clean air filter ensures optimal airflow and engine efficiency, contributing to the overall longevity and effectiveness of your chainsaw.
Why Cleaning or Changing the Air Filter Matters
Over time, dust, debris, and sawdust can accumulate in your chainsaw’s air filter, restricting airflow and causing the engine to run inefficiently. A clogged air filter can lead to a decrease in power, increased fuel consumption, and even engine damage. To keep your Husqvarna chainsaw running at its best, you should clean or replace the air filter regularly—especially if you use it frequently or in dusty conditions.
Steps to Clean or Change Your Chainsaw’s Air Filter
Cleaning or replacing the air filter of your Husqvarna chainsaw is a straightforward process. Follow these simple steps, and you’ll have your chainsaw performing like new in no time!
-
Gather Your Tools and Supplies: Make sure you have everything you need before you start. You will require:
- A clean cloth
- A screwdriver or the appropriate tool to remove your chainsaw’s cover
- A replacement air filter (if applicable)
-
Ensure Safety First: Always remember to wear safety gloves and goggles. Make sure the chainsaw is turned off and completely cooled down before proceeding with any maintenance.
-
Remove the Air Filter Cover: Using your screwdriver, carefully remove the screws securing the air filter cover. Note how the cover fits in case you have to reverse the process. Once off, set the cover aside in a safe place.
-
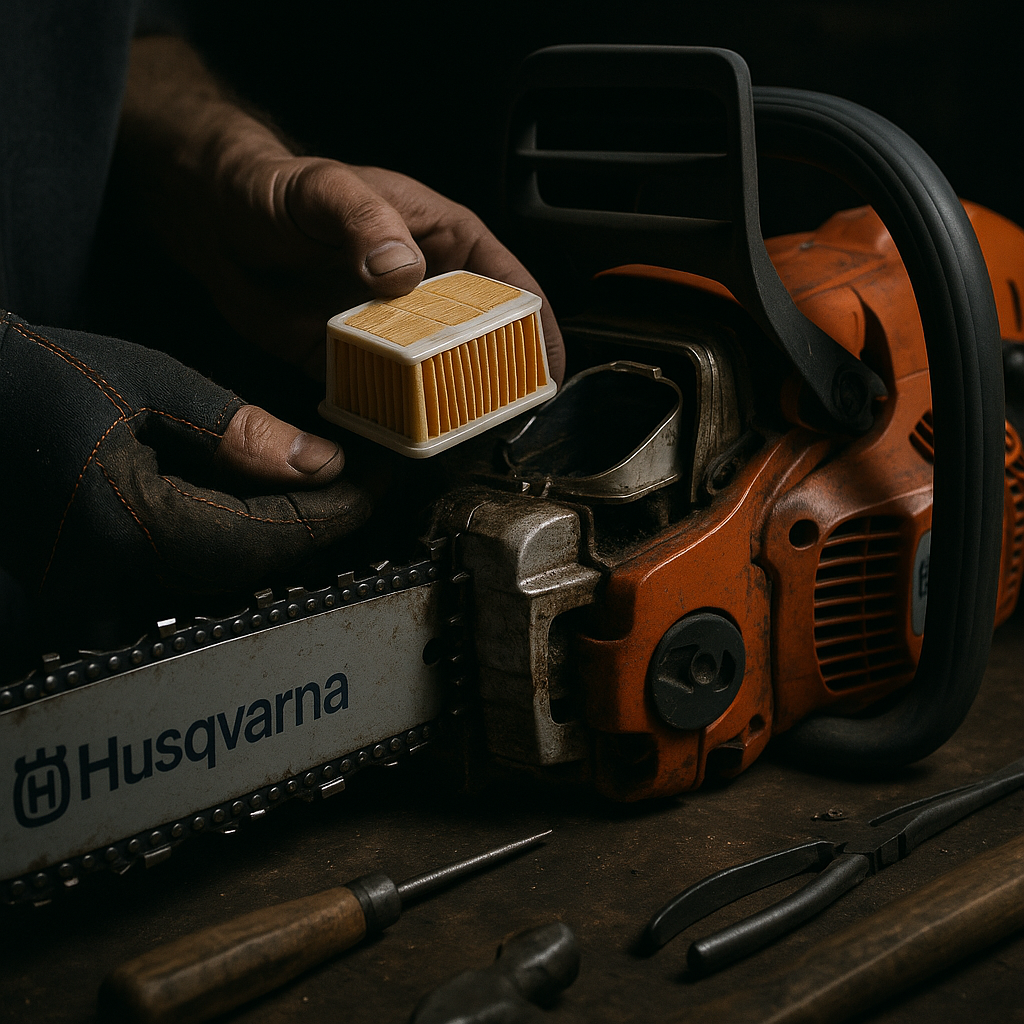
Inspect the Air Filter: Gently pull the air filter out. If it’s clean, you can simply tap it against a hard surface to dislodge any loose dirt. If you notice significant amounts of debris or if the filter is damaged, it’s best to replace it.
By the way, keeping your tools sharp is essential for peak performance. Check out the professional KonKell Chainsaw Sharpeners to save time and effort.
-
Cleaning the Filter: If you choose to clean the filter, rinse it with soapy water or use compressed air to blow out any trapped particles. Allow it to dry completely before reinstallation.
-
Installing a New Filter (if necessary): If your filter is beyond cleaning, simply take your new air filter and place it where the old one was. Ensure it fits snugly.
-
Reattach the Air Filter Cover: Align the air filter cover back onto the chainsaw and secure it in place with the screws you removed earlier. Make sure everything is tight and properly aligned to prevent any issues while running the chainsaw.
-
Test Your Chainsaw: Before heading into your yard work, give your chainsaw a quick test run. Listen for any unusual sounds and observe how it runs. A clean or new air filter should result in smoother operation.
Final Thoughts
Maintaining your chainsaw is vital to ensure its efficiency and longevity. Cleaning or changing the air filter is just one step, but it’s a significant one that can lead to improved performance and reliability. Don’t forget to check the filter regularly as part of your chainsaw maintenance routine, especially after extended periods of use or if you notice performance issues.
Happy cutting, and take care of your tools! Regular maintenance will keep them sharp and ready for any job ahead.
EQUIP YOURSELF FOR THE JOB
Don't let dull tools slow down your workflow. Experience the precision of KonKell chainsaw sharpeners.
View Sharpening Kits construction